Why Your Electricity Bill Keeps Rising Even When You Try to Save
Have you looked at your energy bill and wondered why the amount stays high even when you unplug appliances and take shorter showers? A significant portion of electricity consumption in Brazilian homes goes directly to water heating, especially through electric showerheads, which are among the highest energy-consuming devices in most households.
The good news is that there’s an alternative that more and more people are adopting: the low-cost homemade solar water heater, made with simple and affordable materials. With it, you can pre-heat or even completely heat your shower water using solar energy, paying almost nothing after the system is installed.
By the end of this text, you’ll know exactly what to buy, how to assemble the solar collector at home over the weekend, how much it costs, and what mistakes to avoid so the equipment actually works.
What Does the Sun Have to Do With Your Electricity Bill
Brazil is one of the countries with the highest solar incidence in the world. According to data from the National Institute for Space Research (Inpe), virtually the entire national territory receives between 4.5 and 6.5 kWh of solar energy per square meter per day, depending on the region and time of year. This puts the country in a privileged position to use solar energy in simple and inexpensive ways, including in homemade systems.
The electric showerhead is one of the silent villains of the energy bill. Data from the National Electric Energy Agency (ANEEL) show that water heating accounts for a significant portion of residential consumption in Brazil. When you install a solar collector, even a homemade one, you reduce the time the showerhead’s heating element stays on, which translates directly to fewer reais on your bill every month.
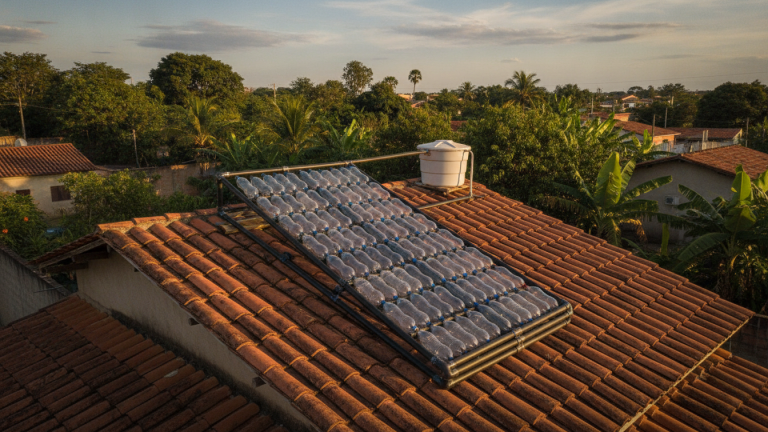
And this doesn’t depend on buying a sophisticated panel or hiring an installer. The system you’ll learn to assemble uses PET bottles, milk cartons, or black PVC pipes, and works especially well for pre-heating: water reaches the showerhead already warm or hot, and the electric heating element works much less.
Required Materials and Estimated Cost
Before getting your hands dirty, it’s worth knowing what you’ll be working with. There are two most popular models of homemade solar water heater: the PET bottles with milk cartons and the black PVC pipes. Both work on the same principle: the dark color absorbs the sun’s heat and transfers it to the water circulating inside the system.
Here’s a quick comparison of the two models:
| Model | Main Materials | Approximate Cost | Difficulty Level |
|---|---|---|---|
| PET Bottle + Milk Carton | PET bottles, long-life cartons, PVC pipe | R$30 to R$80 | Beginner |
| Black PVC Pipe + Water Tank | 25mm PVC pipe, fittings, water tank | R$150 to R$350 | Intermediate |
For the PET model, which is the most accessible and has been successfully replicated by communities in the Northeast and Southeast, you’ll need:
- 50 to 100 PET bottles of 2 liters (you can ask neighbors and your local bakery)
- 50 to 100 long-life milk cartons (the internal aluminum tubes help with heat absorption)
- Half-inch PVC pipe (a few meters, depending on panel size)
- Matte black spray paint
- Flexible hoses for connection
- A small water tank (100 to 200 liters) to serve as a reservoir
- Screws, wires, and a wooden or metal frame to hold the panel
Total cost can be between R$30 and R$150, depending on what you already have at home and what you can repurpose. More robust systems, with water tank and isolated reservoir, reach R$350, but are still much cheaper than industrial systems that cost thousands of reais.
Step-by-Step Guide to Assemble the PET Bottle Collector
This tutorial covers the simplest model, which you can assemble over a Saturday with another person’s help. Average assembly time is four to six hours.
- Collect and prepare the bottles: Wash the PET bottles thoroughly and remove the labels. Cut the bottom of each bottle so one fits inside another, forming a long tube. Each set of bottles will form a column of the panel.
- Prepare the milk cartons: Open the long-life cartons along the seam, wash and let dry. Then wrap each open carton around the neck of a bottle. The internal aluminum of the carton helps capture more heat.
- Paint everything matte black: Using matte black spray paint, cover the bottle columns you’ve assembled. Matte black paint absorbs much more solar radiation than glossy paint. Let it dry completely before continuing.
- Assemble the panel: Fasten the bottle columns side by side in a wooden or metal frame. The width and height of the panel depend on how much space you have on your roof or terrace.
- Install the collector pipes: At the bottom and top of the panel, run a horizontal PVC pipe that will connect all columns. Cold water enters at the bottom, heats up as it rises through the bottles, and exits hot through the upper pipe.
- Connect to the reservoir: Use hoses to connect the panel to a water tank painted black or insulated with thermal blanket. This reservoir stores the hot water until you use it.
- Connect to the showerhead: The outlet from the reservoir connects to the cold water inlet of the electric showerhead. When water already arrives warm, the showerhead needs much less energy to complete the heating.
- Test and adjust: Turn on the faucet and check for leaks. Over the first few days, monitor the water temperature and panel position to ensure it’s receiving direct sunlight for most of the day.
Where to Install and What to Avoid
The position of the collector makes all the difference in results. In Brazil, the sun travels across the northern side of the sky, so the panel should be oriented toward geographic north with an inclination between 15 and 25 degrees, depending on your city’s latitude. Someone living in Manaus needs a smaller inclination than someone living in Porto Alegre.
Avoid installing the collector in areas with shadows from trees, water tanks, or neighboring roofs, at least during peak sun hours, between 9am and 3pm. An hour of shade can significantly reduce system efficiency.
Some common mistakes that compromise results:
- Using glossy paint instead of matte (reflects light instead of absorbing it)
- Not sealing connections between bottles well, causing pressure loss
- Leaving the reservoir exposed to wind without insulation, which cools water quickly
- Installing the panel at too low an angle in cities further south in the country
- Not protecting the bottles with some type of transparent covering, like plastic or glass, which helps create a greenhouse effect and maintain heat
If you live in an apartment and don’t have roof access, it’s still possible to install a smaller panel on a north-facing balcony, or negotiate with your building manager to use a common area on the building’s roof.
Real Results You Can Expect
The performance of a well-assembled homemade solar water heater varies depending on the region, time of year, and number of residents. On sunny days in cities like Belo Horizonte, Fortaleza, or Cuiabá, the system can deliver water between 40 and 60 degrees Celsius, which is sufficient for a comfortable shower without turning on the electric showerhead.
On cloudy days or in winter in southern cities, the system pre-heats the water, reducing the time using the electric heating element. Even in this scenario, the savings are real. Families who participated in social housing projects in partnership with Brazilian universities reported significant reductions in energy consumption, especially in summer.
And more: by using PET bottles and long-life cartons that would go to the trash, you’re also giving useful purpose to waste. Law 12.305/2010, known as the National Solid Waste Policy, encourages exactly this type of creative material reuse. Turning trash into useful infrastructure is one of the law’s principles, which places shared responsibility for the product lifecycle.
If you’re thinking about adopting other sustainable habits besides the water heater, you can start by exploring how to use less water in your shower without sacrificing comfort, which complements this change well and can amplify your savings even more.
Simple Maintenance for Years of System Life
A well-maintained homemade solar water heater can operate for five to ten years, depending on materials and sun exposure. PET bottles, over time, become yellowed by UV radiation, which reduces efficiency. Replacing bottle columns every two or three years is enough to maintain performance.
The basic maintenance checklist includes:
- Check connections for leaks every six months
- Clean the panel with a damp cloth to remove dust and leaves
- Repaint with matte black paint when color starts to fade
- Check that the reservoir is well insulated, especially before winter
- Inspect connection hose to prevent blockages from algae or sediment
None of this requires special tools or advanced technical knowledge. With an afternoon per year dedicated to maintenance, the system continues to work well for a long time.
Frequently Asked Questions About Homemade Solar Water Heaters
Does This Actually Work or Is It Just Theory?
It works, and there are documented projects in Brazil that prove it. Initiatives in communities in the Northeast, Southeast, and Center-West have already installed thousands of units of this type, many developed with support from public universities and city halls. The system doesn’t replace a photovoltaic solar panel, but for water heating it does the job very well.
Can I Install It in an Apartment?
It depends on the apartment layout and orientation. On north-facing balconies it’s possible to install a smaller model, with capacity to pre-heat water for one or two residents. For larger buildings, the best strategy is to talk with the building manager about installing a collective system on the roof.
Doesn’t the Plastic From the Bottles Release Substances Into the Water?
This is an important point. The water circulating in the solar collector should not be the same water you’ll drink directly. The system heats water that feeds the showerhead, and contact with plastic heated by the sun can, in theory, release microparticles. For safety, use the system only for bathing and not for drinking water or cooking.
How Long Does It Take for the Investment to Pay for Itself?
With an assembly cost between R$100 and R$300 and monthly savings that vary depending on your family’s consumption and local rates, it’s reasonable to expect the system to pay for itself in a few months to a year. After that, the savings go almost entirely into your pocket.
Start Today With What You Already Have
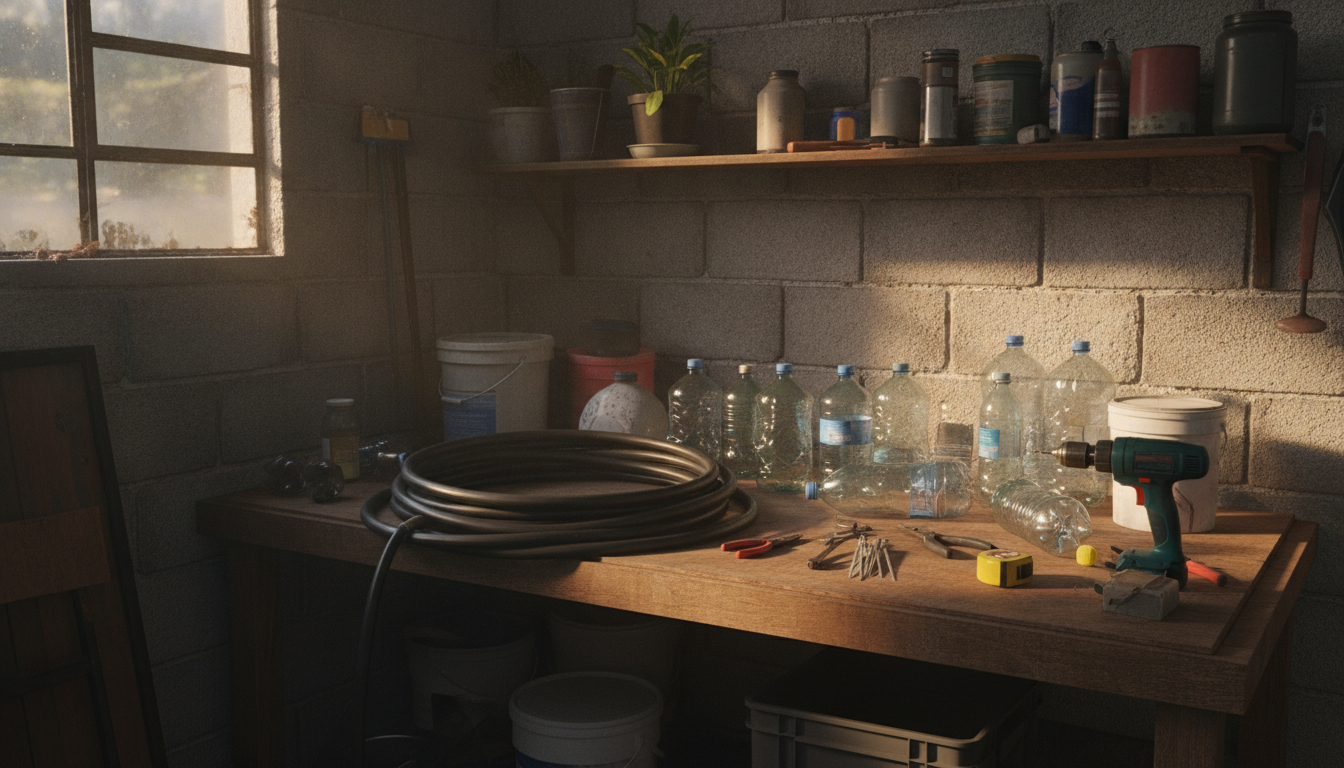
If you have PET bottles at home waiting to go to the trash, you already have the beginning of your solar water heater. Separate the bottles during the week, ask family or neighbors for help, and set aside a Saturday to assemble. It doesn’t have to be perfect the first time: even a small panel, with ten or twenty columns, already makes a difference in your electricity bill and your relationship with energy consumption.
Adopting simple and accessible solutions like this is exactly the type of change that Help the Planet wants to show is possible. Small concrete steps, taken by many people, add up to real impact.
