Why Turning Used Cooking Oil into Soap is One of the Best Sustainable Actions You Can Take
Each liter of improperly discarded cooking oil — poured down the sink, drain, or thrown in the trash — has the potential to contaminate up to a thousand liters of water. This fact, widely publicized by the Ministry of the Environment and municipal recycling programs throughout Brazil, highlights why improper oil disposal is a silent villain of our watersheds. The oil forms an impermeable film over the water, hindering the oxygenation of rivers and lakes, compromising sewage treatment, and damaging public plumbing networks.
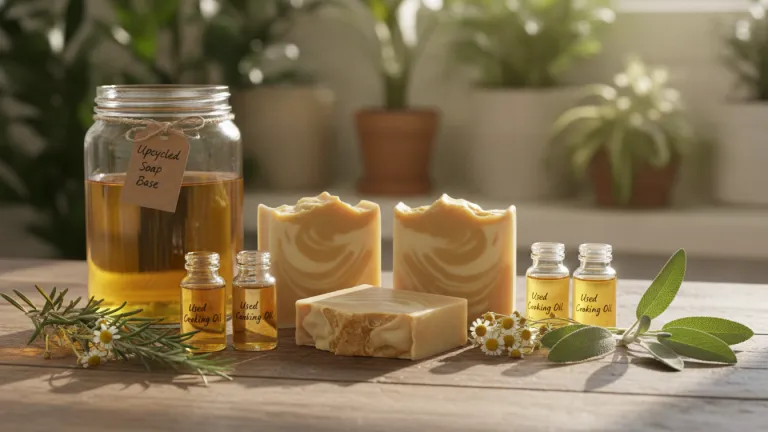
The good news is that there is a simple, old, and surprisingly efficient solution: turning this oil into homemade soap. The process, known as saponification, is a chemical reaction that occurs when a fat comes into contact with an alkaline base — usually caustic soda. The result is a functional, biodegradable soap that is much cheaper than industrial products. Instead of polluting, the oil becomes a useful product for cleaning the house, washing clothes, or even being donated to neighbors and communities.
In this comprehensive guide, you will learn how to make homemade soap with used oil safely, economically, and with maximum efficiency. We will also better understand why this practice goes far beyond a simple recipe — it is a concrete gesture of environmental responsibility that anyone can adopt today.
The Real Problem of Cooking Oil in Brazil
Brazil is one of the largest consumers of vegetable oil in the world. We are also one of the largest producers of soybeans, the predominant raw material in cooking oils sold in the country. The volume of oil consumed domestically is significant, and a substantial portion of this waste still does not have a proper destination.
Reverse logistics programs for used oil exist in several Brazilian cities — such as the ecopoints of the São Paulo city hall, initiatives by Comlurb in Rio de Janeiro, and collection points in supermarkets and gas stations across the country. Even so, public adherence is still far from ideal, and a considerable portion of household oil continues to be improperly discarded.
Homemade soap comes in as a complementary and extremely accessible alternative. Even if you don’t have a nearby collection point, you can give a noble destination to the oil you have already used in your kitchen. And the best part: without spending almost anything.
What You Need to Know Before Starting: Ingredients and Safety
Before any recipe, it is essential to understand the ingredients and necessary precautions. Saponification involves caustic soda (sodium hydroxide, NaOH), a highly corrosive chemical substance. Respecting basic precautions, the process is safe and accessible for any adult.
Essential Ingredients for Homemade Soap with Used Oil
- Used and strained cooking oil — any vegetable oil (soy, canola, sunflower, corn) already used for frying or sautéing
- Caustic soda (NaOH) in flakes or micro-pearls — found in hardware stores, hardware shops, and markets
- Water — preferably filtered or chlorine-free
- Optional: coarse salt (to harden the soap), aromatic essence (for fragrance), or natural dye
Basic Proportion for the Classic Recipe
| Ingredient | Quantity |
|---|---|
| Used oil (strained) | 1 liter |
| Caustic soda (NaOH) | 200 g |
| Water | 400 ml |
This is a widely used proportion in traditional Brazilian recipes. Small variations in oil concentration can slightly alter the result, but this base works well for most domestic vegetable oils.
Indispensable Safety Precautions
- Wear rubber gloves throughout the process
- Protect your eyes with safety goggles
- Work in a ventilated area — the reaction between soda and water releases heat and vapors
- Never use aluminum utensils — caustic soda reacts with this metal
- Keep children and pets out of the area during preparation
- In case of contact with skin or eyes, rinse immediately with plenty of running water
Step-by-Step: How to Make Homemade Soap with Used Oil
Now that you know the ingredients and precautions, it’s time to get your hands dirty — literally. The process is simple and takes between 40 minutes and 1 hour of active work, plus the soap curing time.
What you’ll need besides the ingredients:
- Large plastic basin or bucket
- Wooden or sturdy plastic spoon or spatula
- Molds for shaping the soap (plastic containers, milk cartons, silicone molds)
- Kitchen scale (to measure the soda accurately)
Step 1 — Prepare and strain the oil Pass the used oil through a fine sieve or a clean cloth to remove food residues. This prevents the soap from having a strong odor and improves the final quality.
Step 2 — Dissolve the caustic soda in water With gloves and goggles, add the caustic soda slowly to the water (never the other way around — the heat generated by the reaction can be violent). Stir with the spatula until completely dissolved. The mixture will naturally heat up. Wait for it to cool to about 40–50 °C.
Step 3 — Lightly heat the oil While the soda cools, heat the strained oil over low heat until it reaches approximately the same temperature as the soda mixture (40–50 °C). No thermometer is needed — both should be warm to the external touch of the container.
Step 4 — Mix the two liquids Pour the caustic soda mixture slowly over the oil, stirring constantly in circular motions. Continue stirring for about 30 to 40 minutes, until the mixture reaches the “trace” point — when it thickens and leaves a visible trail on the surface, with a consistency similar to porridge.
Step 5 — Add extras (optional) If desired, add aromatic essence (eucalyptus, lavender, orange) or coarse salt dissolved in a little water to harden the soap more. Mix well.
Step 6 — Pour into molds Carefully pour the mixture into the chosen molds. Cover with cloth or cardboard and let it rest in a cool place for 24 to 48 hours.
Step 7 — Unmold and cure After solidifying, unmold and cut into desired bars. The soap needs to cure for at least 4 weeks in a dry and airy place before being used. During this period, the chemical reaction completes, and the product becomes milder and more effective.
How to Store the Oil Before Use
One of the practical challenges of making homemade soap is accumulating enough oil to make the process worthwhile. Here are some simple tips:
- Use a PET bottle of soda or oil to store used oil daily
- Label it to avoid confusion with clean oil
- Store in a cool, dry place — no need to refrigerate
- Strain before storing to prevent residue fermentation
- When you have at least 1 liter, you have enough for a recipe
Recipe Variations: Liquid Soap and Bar Soap with Different Finishes
Traditional bar soap is just the beginning. With small adaptations, you can create very useful variations:
Multi-purpose liquid soap
To make liquid soap, add more water to the mixture when pouring into molds — or dissolve ready-made bar soap in hot water. Great for washing dishes and surfaces.
Laundry soap with baking soda
Grate the bar soap (already cured) and mix it with baking soda to create a homemade laundry powder. Works well for hand washing and in machines with a gentle cycle.
Scented soap for gifts
With natural essences like lavender, rosemary, or tea tree, homemade soap becomes a charming and sustainable handcrafted gift — a great option for those looking for sustainable bathroom products worth trying.
Real Benefits: Why It’s Worth It Beyond the Environment
The decision to make homemade soap with used oil has positive impacts in various dimensions of daily life:
- Economic: the cost of producing homemade soap is significantly lower than buying industrial soap in the market
- Environmental: each liter of reused oil ceases to be a potential pollutant in the waters
- Social: many communities and solidarity groups produce soap collectively for donation or sale, generating income
- Educational: involving children and young people in the process (with safety and supervision) is a practical way to teach chemistry and environmental awareness
- Self-sufficiency: it is part of a more conscious lifestyle, less dependent on industrial consumption
This type of practice directly connects to a broader mindset change — the same that leads people to grow gardens in apartments, compost organic waste, and rethink what goes to the trash. If you want to delve deeper into this path, check out our guide on how to start living sustainably in daily life.
Conclusion: One Liter of Oil, A Decision that Makes a Difference
Making homemade soap with used oil does not require experience in chemistry, specialized equipment, or much time. It requires attention, safety precautions, and a willingness to learn something new. The result is a functional, inexpensive product with a story — a story of conscious choices that, when combined, have a real impact on the world.
If every Brazilian household that uses cooking oil started to reuse just a portion of this waste, the effects on our waters, sewage networks, and landfills would be noticeable. Not as a distant utopia, but as a direct consequence of simple gestures, repeated regularly.
Start small: save the oil from your next fry-ups, gather the ingredients, and try a recipe over the weekend. Share with neighbors, friends, or relatives. Teach someone. This is the logic of changes that truly work — one decision at a time, one kitchen at a time.
