You throw away banana peels, coffee grounds and kale stems every day without thinking much about it
It makes sense, because it’s what most Brazilians do. According to Abrelpe data, organic waste represents more than half of everything that goes to landfills in Brazil. This means that most of your garbage could transform into fertile compost right inside your home, with almost no cost. And the best part: you don’t need a huge backyard or technical knowledge to start.
The question that stops many people at the start is exactly this: traditional composting or vermicomposting? Both options transform food scraps into rich compost for plants, but they work in different ways and serve different types of residents better. By the end of reading this article, you’ll know which one fits your routine and how to take the first step this week.
If you’re already thinking about reducing the amount of trash you produce at home, it’s also worth checking out how to reduce household waste with simple changes, because the two practices complement each other very well in daily life.
What each method does, in practice
Traditional composting is an aerobic process: microorganisms like bacteria and fungi decompose organic matter in the presence of air and moisture. The result is a dark compost called humus, which improves any type of soil. The process takes two to six months depending on temperature, the mixture of materials, and how often you turn the pile.
Vermicomposting (or worm composting) uses worms, mainly the species Eisenia fetida, known as red wigglers, to accelerate this decomposition. The worms eat the organic material and produce two byproducts: worm humus, considered one of the most complete fertilizers that exist, and worm tea, a dark liquid that, diluted in water, serves as a liquid fertilizer for plants.
The practical difference between the two is not in the quality of the end product, but in scale, space, time, and level of attention you need to dedicate. A compact vermicompost fits on a 40 m² apartment balcony. Traditional composting requires an outdoor spot or at least a well-ventilated space outside the main house area.
Traditional composting: for those who have space and patience
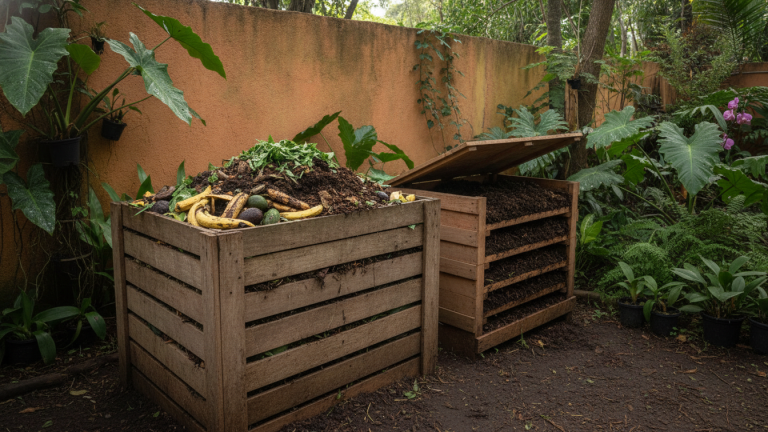
If you live in a house with a backyard, even if small, or have access to an outdoor area in your condo, conventional composting is simple to set up. The logic is balancing wet materials (fruit scraps, vegetables, eggshells) with dry materials (dry leaves, shredded cardboard, sawdust). The ideal ratio is about three parts dry to one part wet, by volume.
How to set up a compost bin at home
- Choose a container with a lid and ventilation holes (it can be a recycled plastic box or a cleaned paint can) or mark off a corner of your yard with mesh.
- Make a base layer with dry leaves or sawdust about 10 cm thick.
- Add the organic scraps and always cover with dry material in a 3 to 1 ratio.
- Turn the mixture with a garden fork or stick every three to seven days to add oxygen.
- Keep it moist like a squeezed sponge: if too dry, spray water; if waterlogged, add more dry material.
- In two to four months, the material at the bottom will be dark, smell like wet soil and have no recognizable pieces. That’s the ready compost.
Estimated initial cost: between R$ 0 (using a box you already have at home) and R$ 80 for a pre-made plastic composter. Time commitment: about ten minutes per week.
The main mistake beginners make is adding too much wet material without compensating with dry. The result is a sour smell and flies. The solution is simple: more shredded cardboard or dry leaves on top.
Vermicomposting: the solution for apartments and those who want faster results
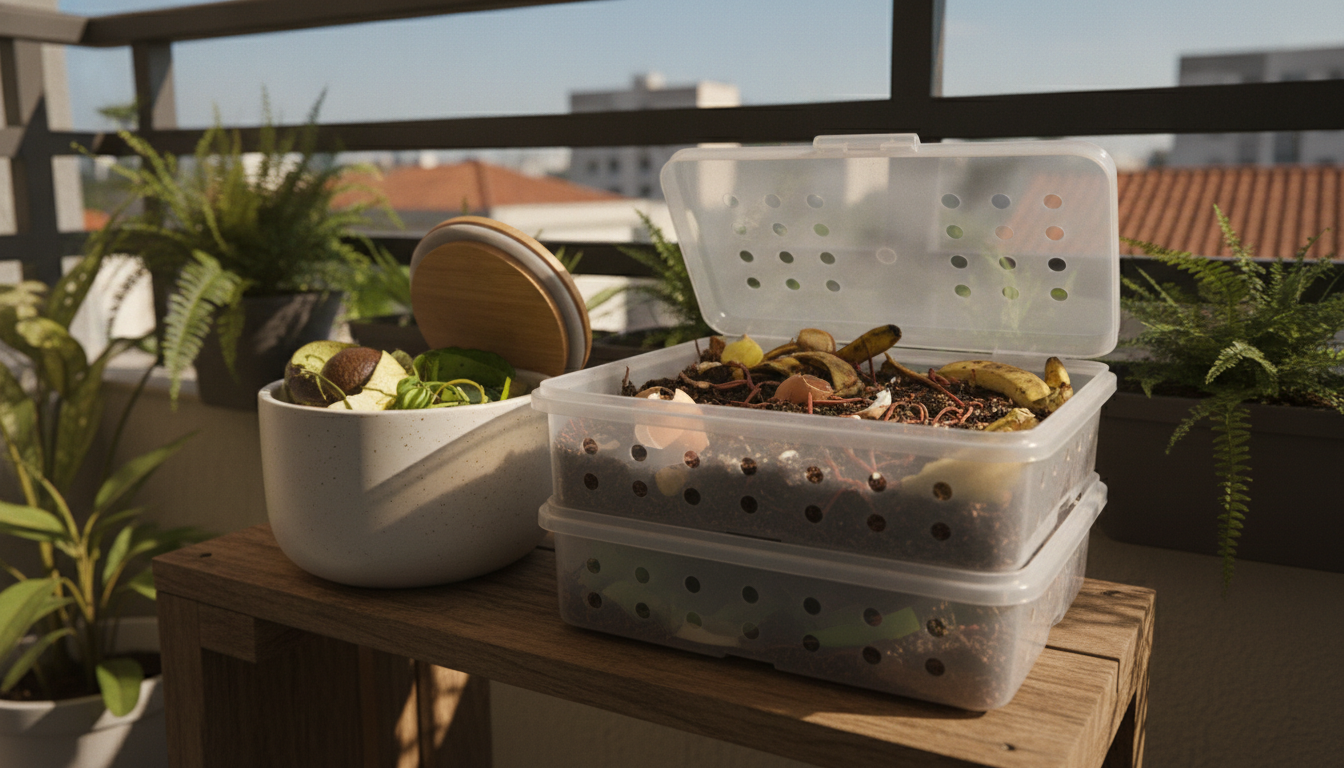
Vermicomposting is, in practice, the most popular choice among apartment dwellers or those with little outdoor space. You can maintain a functioning system in an opaque 60-liter plastic box under the sink, on a balcony, or even in a hallway.
Worms work faster than microorganisms in conventional composting, and the final product has a higher concentration of nutrients. Embrapa has already documented that worm humus has high levels of nitrogen, phosphorus, and potassium in forms readily assimilable by plants.
How to set up a basic vermicompost
Materials:
- Two or three opaque stackable plastic boxes (can be supermarket boxes or organizer boxes)
- Drill or hot nail to make holes
- Red wiggler worms Eisenia fetida (found in fishing stores, online swap groups, or municipal composting centers)
- Initial substrate: soil, humus, or coco fiber
- Drill holes in the bottom and lid of the top box for ventilation and drainage.
- Place the drilled box over another intact one, which will collect the worm tea.
- Add the moist substrate in the top box about 10 cm thick.
- Release the worms onto the substrate and cover with a damp cardboard sheet.
- Start feeding with small amounts: half a cup of fruit and vegetable scraps every two or three days. Observe if the worms are consuming before increasing the amount.
- Avoid onion, garlic, lemon, meat, dairy, and very greasy foods. These items disrupt the environment and can kill the worms.
- Collect the worm tea from the lower box every week or two, dilute in ten parts water, and water your plants.
- In two to three months, the contents of the top box will be transformed into dark humus, ready to use.
Estimated initial cost: between R$ 30 and R$ 150, depending on where you buy the worms and boxes. Worms from swap groups cost little to nothing.
Direct comparison: which works better for you
| Criteria | Traditional Composting | Vermicomposting |
|---|---|---|
| Space required | Outdoor area or backyard | Balcony, kitchen, hallway |
| Time to ready compost | 2 to 6 months | 2 to 3 months |
| Initial cost | R$ 0 to R$ 80 | R$ 30 to R$ 150 |
| Weekly commitment | 10 min (turning) | 5 min (feeding and collecting) |
| Accepts meat and dairy | In small quantities | Not recommended |
| Extra product | Solid compost only | Solid compost + liquid tea |
| Ideal for | Houses, condos with green areas | Apartments, houses without yards |
Common mistakes that make people give up
People who give up usually stumble on one of these points. Knowing the problems before you start makes all the difference.
- Strong smell: almost always caused by excess wet material or lack of aeration. Add more dry material and turn more often.
- Flies or small insects: appear when scraps are exposed. Always cover scraps with dry material or a layer of soil.
- Worms escaping the vermicompost: sign that the environment is hostile, too hot, too acidic, or too wet. Check the temperature (ideal between 15°C and 25°C), remove excess citrus foods, and adjust moisture.
- Material that doesn’t decompose: large pieces take longer. Chop scraps into smaller pieces before adding. Whole pineapple skin can take weeks; cut into four pieces, days.
- Thinking you need everything perfect to start: you don’t. Starting with what you have, adjusting along the way, and observing the process is enough.
Brazil’s National Solid Waste Policy (Law 12.305/2010) recognizes composting as one of the priority forms of organic waste disposal. This means what you’re doing at home is aligned with Brazilian environmental policy, no matter how simple it seems.
What to do with ready compost
Using the compost you’ve produced yourself is one of the most satisfying parts of the process. It can go to pots on the balcony, to a home garden, to ornamental plants, or can be donated to the neighborhood fair, to neighbors who have a garden, or to community garden projects.
Vermicompost tea, diluted in water at a ratio of 1 to 10, works as an efficient liquid fertilizer for any plant. Many people start saving money on bought fertilizer, which is a real and concrete gain in the household budget.
If you notice you’re producing more compost than you use, look for seedling and fertilizer swap groups on social media in your city. These groups exist in almost all Brazilian capitals and have grown a lot in recent years. It’s a way to circulate what you’ve produced and meet people with the same interests.
Frequently asked questions about home composting and vermicomposting
Can I compost in an apartment without a balcony?
Yes, but with limitations. Vermicomposting is the most viable option in this case, and can fit in a ventilated cabinet or under the sink. Traditional composting needs constant ventilation and is usually inconvenient in enclosed spaces.
Does a vermicompost smell bad?
When balanced, it smells like moist soil, almost nothing. Bad smell only appears when there’s excess food decomposing or materials that shouldn’t be there, like meat and dairy. With basic care, a well-made vermicompost won’t bother anyone in the house.
How much time per week do I need to dedicate to this?
Less than it seems. A vermicompost takes about five minutes every two or three days to feed and check the tea. Traditional composting takes a weekly ten-minute turn. It’s less time than you spend sorting trash for selective collection.
What if I travel for two weeks?
The vermicompost can handle an absence of up to ten to fifteen days as long as it’s well-fed before you leave and has adequate moisture. Leave a good amount of damp cardboard on top to maintain temperature. Traditional composting can handle even longer absences since it depends less on a living organism in accelerated rhythm.
Start small, but start today
You don’t need to set up the perfect system tomorrow morning. Start by saving today’s organic scraps in a lidded container in the fridge or a small kitchen bucket. In two or three days you’ll already have enough material to take the first step, whether it’s setting up a simple worm box or starting a composter in the yard.
The choice between the two methods matters less than the decision to start. And if you want to understand how to fit this into a broader routine of waste reduction, the path of how to reduce household waste with simple changes will help you close the cycle with even more consistency.
